Package Managers
NPM is probably the best known package manager for setting up and running a
node.js
project. When
node.js
is installed,
npm
gets installed with it, so
there is no need to install
npm
separately. NPM sets up the development
environment of your project, which in our case we are using hardhat as our
development environment, and installs important dependencies, which are other
pieces of software that are needed to help the core software of the project run.
Examples of dependencies are OpenZeppelin/contracts, ethers.js, chai or
typescript.
Choose your operating system and setup from the choices below:
Installing node.js and npm with nvm on Windows 10/WSL2
If your operating system is Windows 10 or 11 and you have not installed WSL-2
yet, Microsoft has a pretty good article that can help you install Linux on your
Windows machine here: https://docs.microsoft.com/en-us/windows/wsl/install . One
minor change to the directions should be to the commands to add a specific
distribution. You will want to choose the Ubuntu Linux distribution, so you will
want to use the following command when installing WSL with the command line,
wsl --install -d Ubuntu-20.04
. This will ensure that a long-term supported
version of Ubuntu Linux is installed on WSL-2. If you need additional info, you
can also refer to the Tooling section of Lesson 2, which gives direction on
operating systems, a command line mini-lesson and more.
Let’s get the party started and install
npm
on WSL2!
Click on the Window, then open Ubuntu 20.04 on Windows.

We need to install curl into our WSL-2 instance, so type into the command line,
sudo apt-get install curl
. You may be prompted for a password. It is the same
password you created when you first set up WSL-2. You are prompted to use the
password because you are using
sudo
which is “super user permission”.
cURL
allows us to to download necessary software from outside software library
servers.

Next, we want to install Node Version Manager (nvm). NVM is a super helpful tool
because it allows you to download and run different versions of npm. In our
command line, we need to copy and paste the following command:
curl -o- https://raw.githubusercontent.com/nvm-sh/nvm/v0.39.1/install.sh | bash
and hit Enter. Let’s verify that it was installed correctly by typing
command -v nvm
. This should return nvm if it was installed correctly. If you
get an error or no output, close the Ubuntu terminal down and restart it. It
should now return nvm.

We’re all ready to install our first version of node.js! 👍 For this demo, I
installed node.js version 14.16.0. In the command line type
nvm install 14.16.0
and hit enter. This will install this version of node.js
and it can be verified by typing
node -v
for the node.js version and
npm -v
for the npm version. In the event that you need a different version of node.js,
the commands
nvm install <VERSION>
will install the new version.

After you have installed a few different versions of node.js depending on the
requirements of your projects, you can list the versions using the
nvm ls
command.

To change the version from the list generated by nvm ls, you can type in the
command
nvm use <VERSION>
. In my case I wanted to use node.js version 16.17.0,
so I typed in
nvm use 16.17.0
and verified the node.js version by typing in
node -v
where
it returned v16.17.0.

Installing node.js and npm on Mac iOS
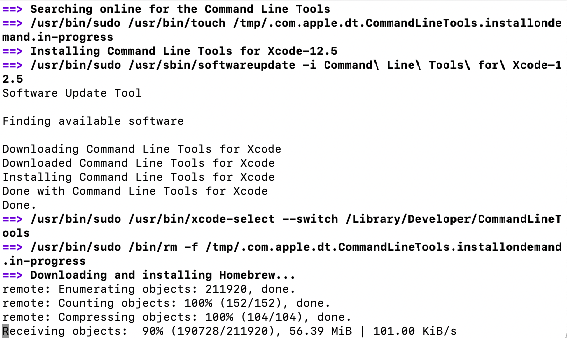
Lucky Mac users! Your Terminal comes pre-loaded with Mac iOS. 😀 After we find
the Terminal, we will need to install Homebrew, which is a package installation
software for Mac iOS. Once brew is installed, we can install node.js and npm.
The directions follow:
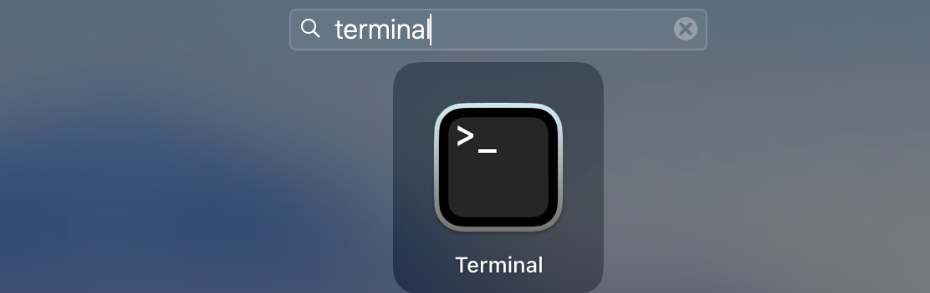
Go to Launchpad and type terminal into the search bar. This will bring up the
terminal icon. Click on the icon.

Install brew by copy and pasting the command below:
ruby -e "$(curl -fsSL https://raw.githubusercontent.com/Homebrew/install/master/install)"
Copy and paste each of these 2 commands separately to set the correct PATH for
brew
. MAKE SURE TO CHANGE YourUsername TO
yourOwnUserName
WITHOUT “< or >”.
echo 'eval "$(/opt/homebrew/bin/brew shellenv)"' >> /Users/<YourUsername>/.zprofile
eval "$(/opt/homebrew/bin/brew shellenv)”
Verify the installation by typing in brew , then Enter. You should see the menu
as below: 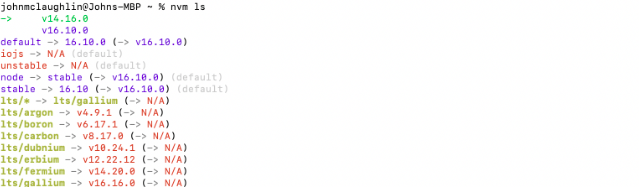
Remove existing Node Versions. Even if you have never worked with
nodejs
before, it is recommended to NOT skip this step. Execute the 2 commands
separately below:
brew uninstall --ignore-dependencies node
brew uninstall --force node
Install
NVM on macOS.** The following commands with
brew
and install
nvm`:
brew update
brew install nvm
Important steps to make the directory for
nvm
and set its PATH:
- Create the directory for
nvm
:
mkdir ~/.nvm
- Set environment variables in the
.bash_profile
file:
vim ~/.bash_profile
- Type the letter “i” to allow —INSERT—, then type in the code below on the in
the first 2 lines at the top:
export NVM_DIR=~/.nvm
source $(brew --prefix nvm)/nvm.sh
- Press ESC + :wq to save and close your file.
- Load the variable to the current shell environment:
``source ~/.bash_profile`
- Verify the installation in the command line with
nvm
and it should return
the following:

Hang in there! We’re almost done! 👍 😀
Let’s install a few different versions of
nodejs
and
npm
(finally!😅)!
- You can install the latest
nodejs
version with:
nvm install node
- In my case, I needed 2 specific versions of
nodejs
(also known as node
)
16.10.0
and 14.16.0
because the dependency versions were needed for my
particular projects. I install each separately using the following:
nvm install 16.10.0
nvm install 14.16.0
Verify our
nodejs
versions in
nvm
:
nvm ls
You did it!! nodejs and npm have been installed with nvm. Woo hoo!! 🎉💥
Installing
node.js
and npm
with nvm
on Ubuntu LinuxInstalling
nvm
on Ubuntu Linux is very easy. If it is a new installation of
Ubuntu, we will need to install
cURL
, then install
nodejs
with
npm
. Just
in case you were curious,
cURL
is a command line tool that developers use to
transfer data from one server to another, in our case to download
nvm
. After a
few easy steps, you will be up and running! 🏃🏾♀️
-
Install
cURL
if it is not already installed with sudo apt install curl
.

-
Download nvm with cURL:
curl https://raw.githubusercontent.com/creationix/nvm/master/install.sh | bash

-
Rather than log out and log in again to set our environment for
nvm
, we can
simply set the environment by executing: source ~/.bashrc
-
Verify your installation with the command
nvm
and you should see the output
below.

-
Install the latest version of
nodejs
(also known as just node
) with
nvm install node
.

-
Install a specific version of
node
with nvm install <VERSION>
.

-
Install another specific version of
node
with nvm install <VERSION>
.

-
List all of your installed versions of
node
with nvm ls
. In my case there
are several that have already been installed.

-
Let’s verify the current loaded version with
node -v
.

-
Now we can switch to another installed version using
nvm use <VERSION>
.

You made it to the end of our nodejs and npm installation with nvm tutorial!
Congratulations!! 🎉💥🥇